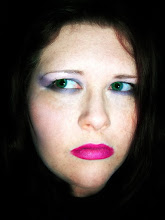
This is my favorite method. I've used this method in most of my recent drawings and I'm always pretty content with the results. Basically what you're doing is creating squares and then drawing the image that goes in that particular square. Of course you do have to zoom out with your eyes to see the whole picture to check it. If you don't, something will get messed up along the way and look stupid. Doing it on paper is more difficult because you have to draw the grid out so it's definitely time consuming. But I have done it many times. In photoshop it's a breeze because you simply turn on the grid and use the count tool.
Pencil and paper
If you cannot draw on your reference image then use tracing paper or a gallon sized ziplock bag.
- Place your ruler horizontally at the top of the page on your reference image (tracing paper)
- Make a mark for each half inch or inch (it's your call)
- Place your ruler horizontally at the bottom of the page on reference image (or tracing paper)
- Make a mark for each half inch or inch (whatever you did for the top)
- Turn your ruler vertically lining up the first top and bottom marks. Draw line.
- Repeat this until you have made lines for all marks
- Place your ruler vertically at the left edge of your reference image.
- Make a mark for each half inch or inch (again whatever you used earlier).
- Do the same for the right edge of the image
- Line the left and right sides up with the ruler and draw your lines.
- Now number your squares. (You can number them however you want. I usually do every other or every 4th square. It's whatever you will think will work best for you.)
- Now on your sketchpad do the exact same thing making sure to use a very light pencil and very light pressure.
Now you're ready to draw.
Computer people
- Have the reference image and new image open and ready to go.
- Make sure you new image is the exact same size as reference image (checking pixels and resolution).
- Go up to edit and scroll down to preferences then click on "Guides, Grids, & Slices".
- Under "Grid" set "Gridline every" to 1 and "Subdivisions" to 1
- Beside "Gridline every" you'll see a drop down box. Set it to "cm" and click "ok". (You can change the settings to whatever your preference is. This is what I had it set to for the video. The grid will appear larger or smaller depending on the size of the picture and resolution.)
- You will have to do the next 3 steps for both the reference and new image. Click on "View", scroll down to "Show" and then make sure "Grid" is checked.
- Again click on "View" and scroll down to "Show" and make sure "Count" is checked.
- Click on "View" and scroll down to "Snap" and make sure it's UNchecked. If it's checked, when you draw, your brush will snap to the gridline instead of drawing where you wanted to.
- On your toolbar find your eyedropper tool. Click on the little arrow on the bottom corner of it so the dropbox appears and click on the count tool.
- Now number the squares in your reference to your liking. Make sure you number the new image exactly the same.
You're ready to draw.
Here's a video and it shows the steps to setting up the grid in photoshop (you may need to pause it at times). Enjoy some Fatboy Slim.
Well, that concludes the 3 different ways I make a sketch. There are tons of methods out there and these are just the ones I use. If you think there's a better method, leave a comment and I'll give it a try!
Next we're going to clean up the sketch and start shading. Should be in a couple days.
Check ya later!!


0 comments:
Post a Comment